
VLTI time-link p2 Tutorial
This tutorial provides a step-by-step example of the preparation of a time-link of concatenations for the VLTI. This uses the functionality of nested containers, which include groups of concatenations or time links of concatenations. The use of time-links of concatenations is recommended for VLTI observations of time series. For this tutorial, we use as an example OBs prepared for the MATISSE instrument. We focus in this tutorial on the creation of the nested cotainers, not on the specifics of MATISSE OBs, so that this tutorial is also relevant for OBs prepared for the VLTI PIONIER or VLTI GRAVITY instruments in the same way.
For the creation of OBs specifically for each of these VLTI instruments, we refer to the GRAVITY p2 tutorial, the PIONIER p2 tutorial, the MATISSE p2 tutorial, or the MATISSE GRA4MAT p2 tutorial.
1: Getting Started
The Phase 2 process begins when you receive a communication of the ESO Observing Programmes Office (OPO) announcing that the allocation of time for the coming period has been finalized and that you can view the results by logging into the UserPortal and clicking on "Check the webletters."
Let's assume you were granted observing time with one of the VLTI instruments in service mode, and the goal of your run consists in collecting observations to reconstruct the orbit of a binary. In this case, the individual observations should not be executed stand-alone, else you might end up with more than one observation per night when the secondary star has hardly moved in its orbit around the primary. For VLTI observations, each individual observation normally (except for astrometric observations with the GRAVITY instrument in some cases) consists of a concatenation of science (SCI) and calibrator (CAL) OBs, which we will now put in a time-link container.
To start preparing your Phase 2 material including observation blocks, instructions, and finding charts with the web application p2, we recommend you familiarize yourself first with the creation of individual OBs and concatenations for your instrument using the instrument-specific p2 tutorials and references therein first:
- the GRAVITY p2 tutorial
- the PIONIER p2 tutorial
- the MATISSE p2 tutorial or
- the MATISSE GRA4MAT p2 tutorial.
For the sake of this tutorial, we will use the p2 demo facility at https://www.eso.org/p2demo, as we do for the individual instruments above (more information therein).
2: Creating a time-link of concatenations
2.1 Goal of the run
In this tutorial we prepare a time-link of SCI/CAL concatenations for the binary Delta Sco. Even though the orbital period is almost 11 years, we plan to observe during periastron and need at least 10 days between observations.
2.2 Creating the time-link container in p2
Select the folder corresponding to the MATISSE tutorial run, 60.A-9252(N) by clicking on the + icon next to it. In this tutorial we assume that time was allocated in Service Mode. This is indicated by the small wrench icon that appears next to the RunID. There may be other folders are OBs visible, as this account is a public account and used for testing by other people as well.
In the p2 demo you must first start by creating a folder, within which you will put your own content.You can create a folder by clicking on the icon New Folder. Please notice that a folder named by default New Folder will appear at the bottom of the list of items in the run. Because the p2 demo is on-line and accessible to anyone you may see folders belonging to other people here, though after-the-fact clean-up is encouraged and possible.
We named the folder "Time-link tutorial, clicked the orange "T" symbol to create a time-link, and named it "Orbit of a binary"
Your screen should now look like this:

2.3: Creating the SCI-CAL concatenations inside the time-link container
All VLTI OBs are normally part of concatenations, which is a type of container in which OBs are executed in sequence. For MATISSE, you can use sequences like CAL-SCI, SCI-CAL, or CAL-SCI-CAL.
We thus first create a concatenation container underneath the time-link container that we created above. We select and open our new time-link container 'Orbit of a binary' by clicking on the + icon next to it. We then create the concatenation container by clicking on the icon for a concatenation, labeled "C" in purple in the icon bar below your created time-link. We name it "delsco_1":

This creates an empty container of type concatenation in your time-link.
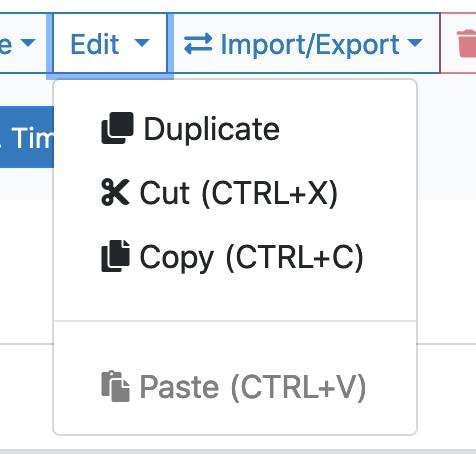
You can now create your SCI and CAL OBs within the concatenation container "delsco_1" in the same way as detailed in the MATISSE p2 tutorial. If you already have created a SCI-CAL concatenation outside of the time-link container, you can alternatively cut&paste or copy&paste an existing concatenation into this group using the 'Edit' function in top of your p2 window:
We named our OBs CAL_epssco, followed by SCI_delsco, following the naming convention for VLTI OBs.
In the acquisition templates, we have indicated 'large' for the interferometric array and 'time-series' for the type of interferometric observation:


2.5: Advanced timing instructions
Let's assume you are lucky to be in the situation of preparing observations of a binary whose orbital period is comparable to the length of the ESO schedule period (so that in the ideal case the entire orbit could be covered observationally). If your binary orbit is highly eccentric (as known from the spectroscopic orbit), the above scheme might not produce the best result as the secondary star moves much faster during periastron. Since you know the epoch of periastron, you could create two time-link containers and use the option of defining additionally absolute time intervals to restrict one container to the periastron passage and the other one to the phases with large separations.
Absolute time intervals apply to OBs, and can only be defined for the first OB of a time-link. Below you can see how they are specified.
