
X-SHOOTER blind offset
Screenshots for this tutorial were made using the demo mode of p2, but should not differ in any way from one's experience in preparing your own OBs under your run.
Goal of the Run
In this tutorial we describe how to prepare the OBs to observe a faint target (HH212, RA(ICRS) = 05:43:51.41, DEC(ICRS) = -01:02:53.1) to be acquired using the blind-offset technique. We will only focus on setting up the acquisition template and finding charts for this target. A more thorough description on various aspects of creating an OB for X-Shooter with p2 is availble in other examples (e.g., eta Car example).
What's new from P108
As reported here, as of P108 (October 2021) the convention for the blind offset acquisition with X-Shooter has been changed in order to follow the VLT standard. Section 3.1.2 of the XSHOOTER User Manual contains details about this change. In short, the coordinates of the acquisition star will NOT be used anymore in the Target field of the OB, rather the actual coordinates of the Science Target will remain, and the offset will be computed from the Science Target to the Acquisition Star.
ObsPrep will help us in preparing this observation.
Target coordinates
Move to the "Target" tab of p2. If the target can be resolved by SIMBAD, type in the name and press the "resolve" button, which will result in the automatic compilation of the coordinates and proper motions fields.
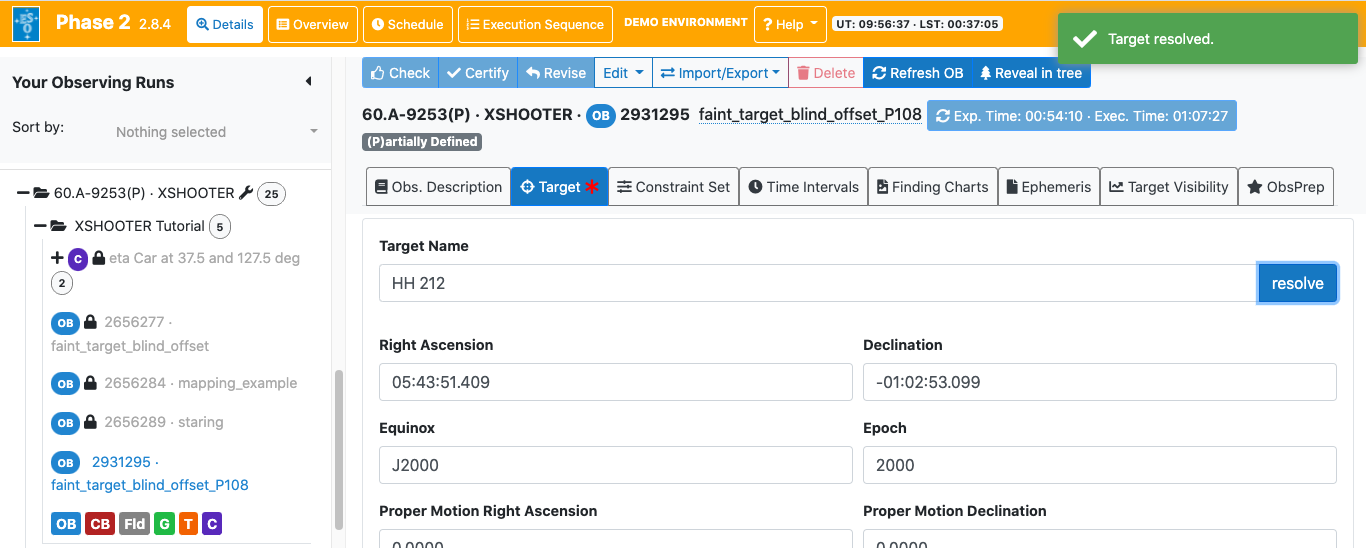
If, instead, the coordinates of the target are known but the target cannot be resolved with SIMBAD, then simply fill in the Target Name and coordinates fields manually.
Setup the acquisition and science templates
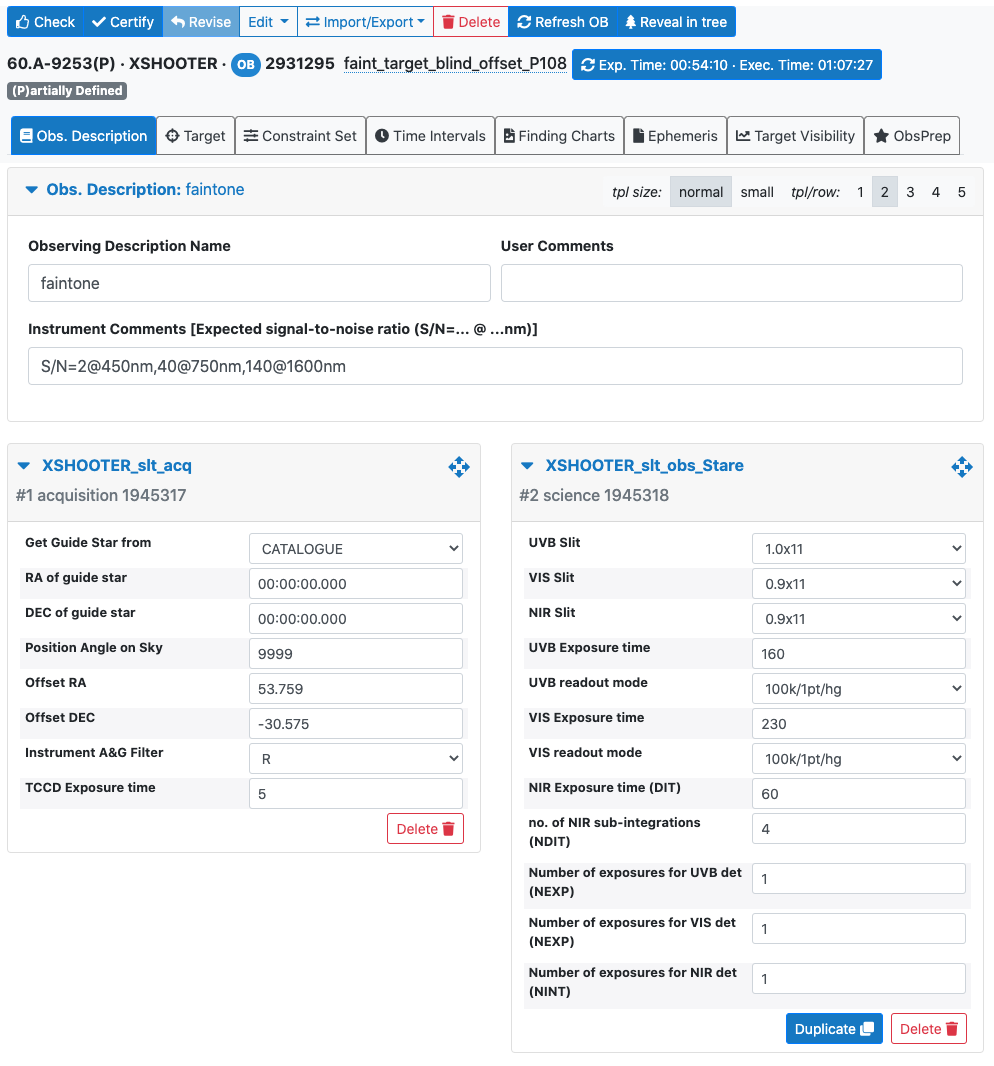
Move to the "Obs. Description" tab of p2. Set up the acquisition template (in this case XSHOOTER_slt_acq) and the observation template (XSHOOTER_slt_obs_Stare for this example). Note that the "Offset RA" and "Offset DEC" fields are set to 0, i.e. no offset in the aquisition.

Please note that the S/N and integration information in this example are not checked against ETC performance for this specific target.
Select the blind offset reference star
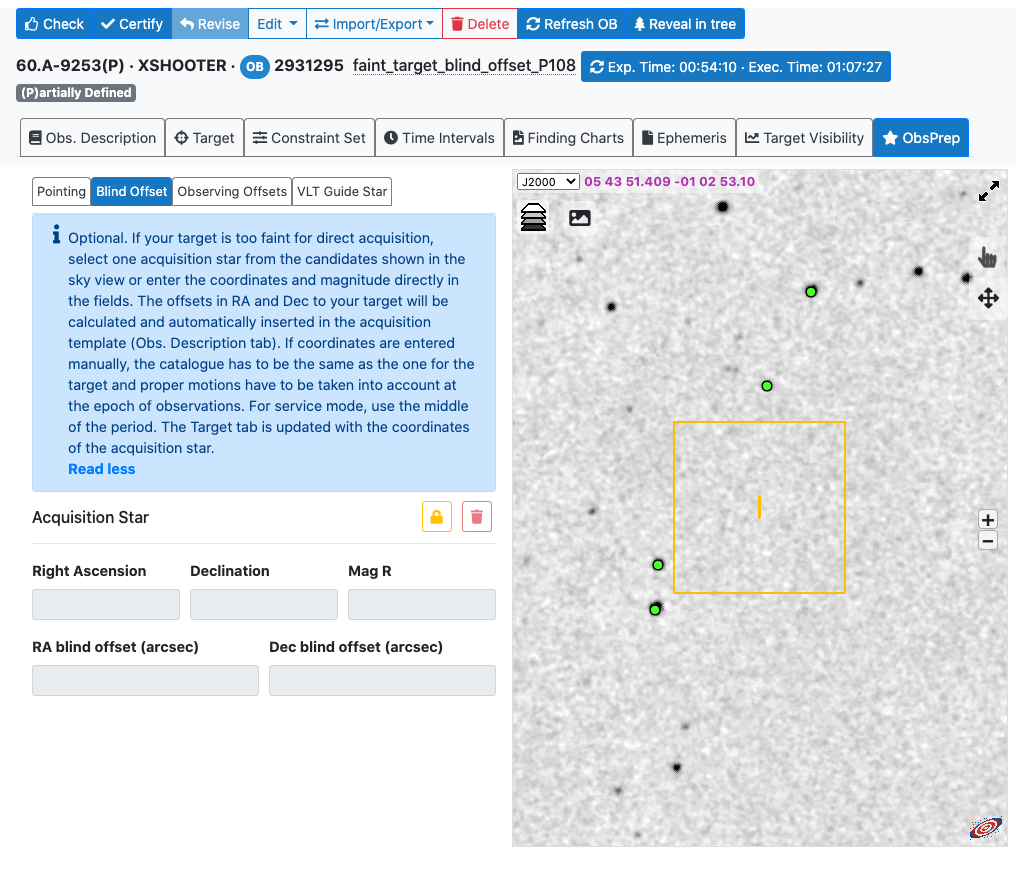
Move to the "ObsPrep" tab of p2. Click on the "Blind Offset" tab, the possible Acquisition Star(s) will show up as green circles on the sky map, also showing the slit and the FoV of the instrument centered on the Science Target coordinates.
Select one star to be the Acquisition Star. The coordinates of this Acquisition stars will be automatically added in the fields to the left of the image, together with the computed offsets from the Science Target to the Aquisition Star.
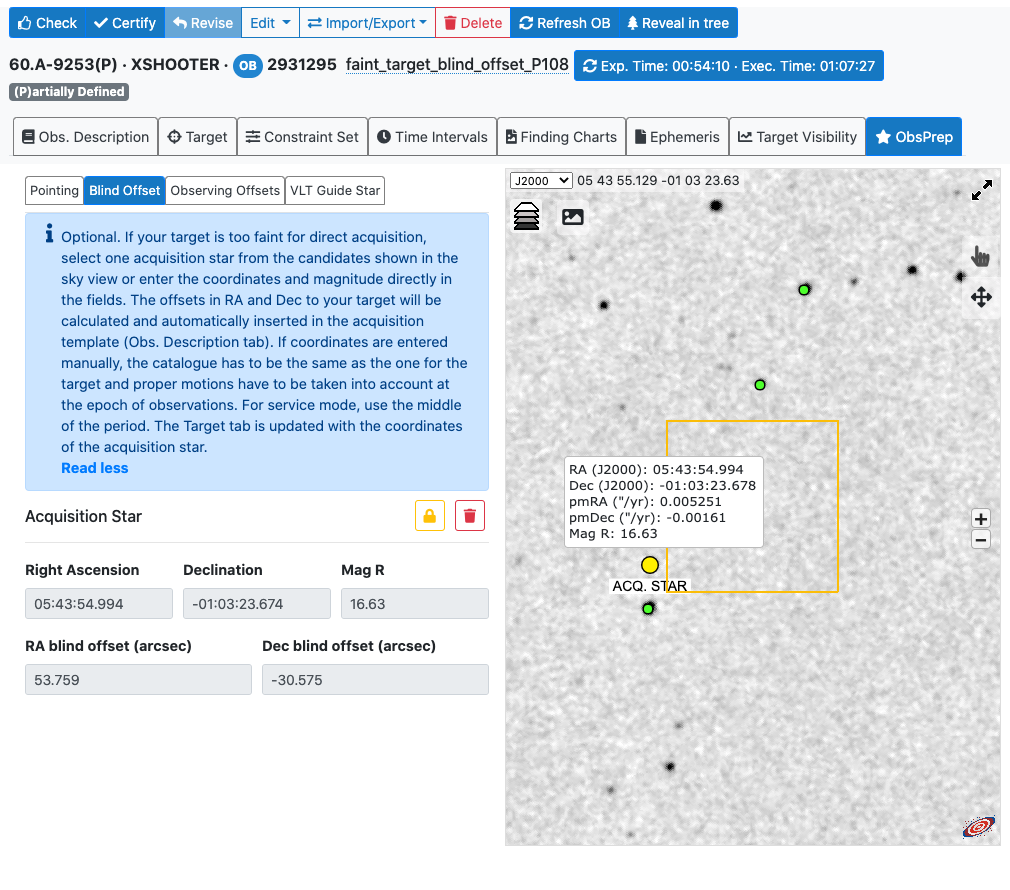
You can now check in the "Target" tab that the coordinates of the Science Target are still listed, while in the "Obs. Description" tab the values of "Offset RA" and "Offset DEC" are automatically modified and match the ones calculated by ObsPrep.
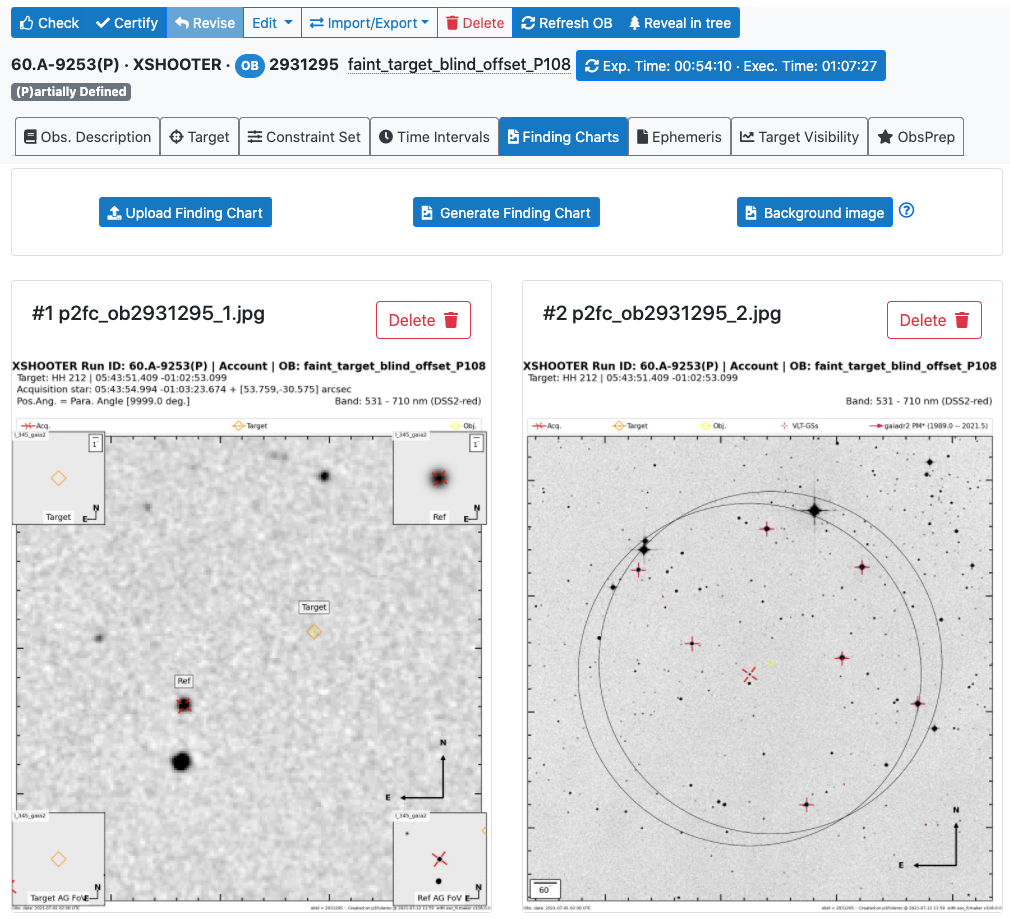
Generate the Finding Chart
Move to the "Finding Charts" tab of p2. Here you can automatically generate a ESO/VLT-compliant finding chart for your target. Press the "Generate Finding Chart" button and wait some seconds. Your finding chart will show the position of the Acquisition Star ("Ref") and of the Science Target ("Target"), the latter being usually not visible in the case of blind offset acquisition.
Please note that as of P108 only Finding Charts generated with the P108 version of p2fc (the automatic Finding Chart generator behind the "Generate Finding Chart" button) will be accepted. This is in place in order to avoid misunderstanding between the old and the new convention for blind offset.
Finishing the preparation, then Check, Certify and Notify ESO
This tutorial only focused on the blind offset acquisition template. Please remember to check all the other parameters of your OB, including the observing strategy (stare/nodding/offset/mapping), the exposure time, instrument comments, observing conditions constraints, time constraints, ephemeris files, README, and so on, and then proceed with the usual sequence:
- click the "Check" button (to the right of the Exec. Time button) for each OB. Check performs consistency checks on the selected OB(s).
- click on the Certify" button (to the right of the Check button). Certify does the same as Check, but additionally (if the check was successful) marks the OB(s) as fully compliant and reaxdy for ESO's review. It also marks the OB(s) as readonly.
- (optionally) select one or more certified OBs and click on the "Revise" button (to the right of the Certify button) to revoke the certified status and allow re-editing. If this is done it steps 1 and 2 above should be re-done for the OB(s) in question.
- complete the information in the README file
- click on the "Notify ESO" button (to the right of the Revise button). This will lock all certified OBs as well as the README, in preparation for ESO's Phase 2 review process.
Finally, please note that when looking at the tutorial run in the p2 demo facility you will see that both OBs are marked as (+) Accepted. This is a state that these OBs have been set in (by ESO) solely to avoid them being inadvertently deleted from p2.