
User Background Images
As of mid-2020, we have implemented the possibility for users to upload their own FITS files to be used as the background image for ObsPrep and p2fc.
User background images are also fully supported by the Python p2api package.
Supported file formats
Only FITS files can be used as user background images. The FITS files must satisfy the following requirements:
- the file must contain an image. BOTH single HDU and Multi-Extension FITS files can be handled. In particular it can handle ESO instrument RAW images, pipepline products and ADPs from the Science Archive Facility.
- each image HDU must contain a valid WCS
- the target of the OB must be located within the field of view of the image
- if the OB includes a Blind Offset Acquisition [BOA], the BOA reference star must also be within the field of view of the image.
In the case of MEF 'paw-print' type files, the check for the location of the target and the reference star of the Blind Offset Acqusition (if defined) is done within each extension, i.e. if the target or BOA reference fall within a gap between chips, this check will fail.
User Interface
User background images can be uploaded from both the "Finding Charts" and the "ObsPrep" tabs. Any uploaded user background images are then available for use (without having to upload again) by both tools.
From the Finding Charts tab
Click on the blue "Background image" button.

A "Select background image" pop-up window will appear showing in the left hand side the available background images including choices for the default survey, an image based on GAIA, any previously uploaded user background images compatible with the coordinates of the target and BOA of this OB, and any ESO Science Archive Facility images compatible with this OB. The currently selected background image is displayed in the right had side.
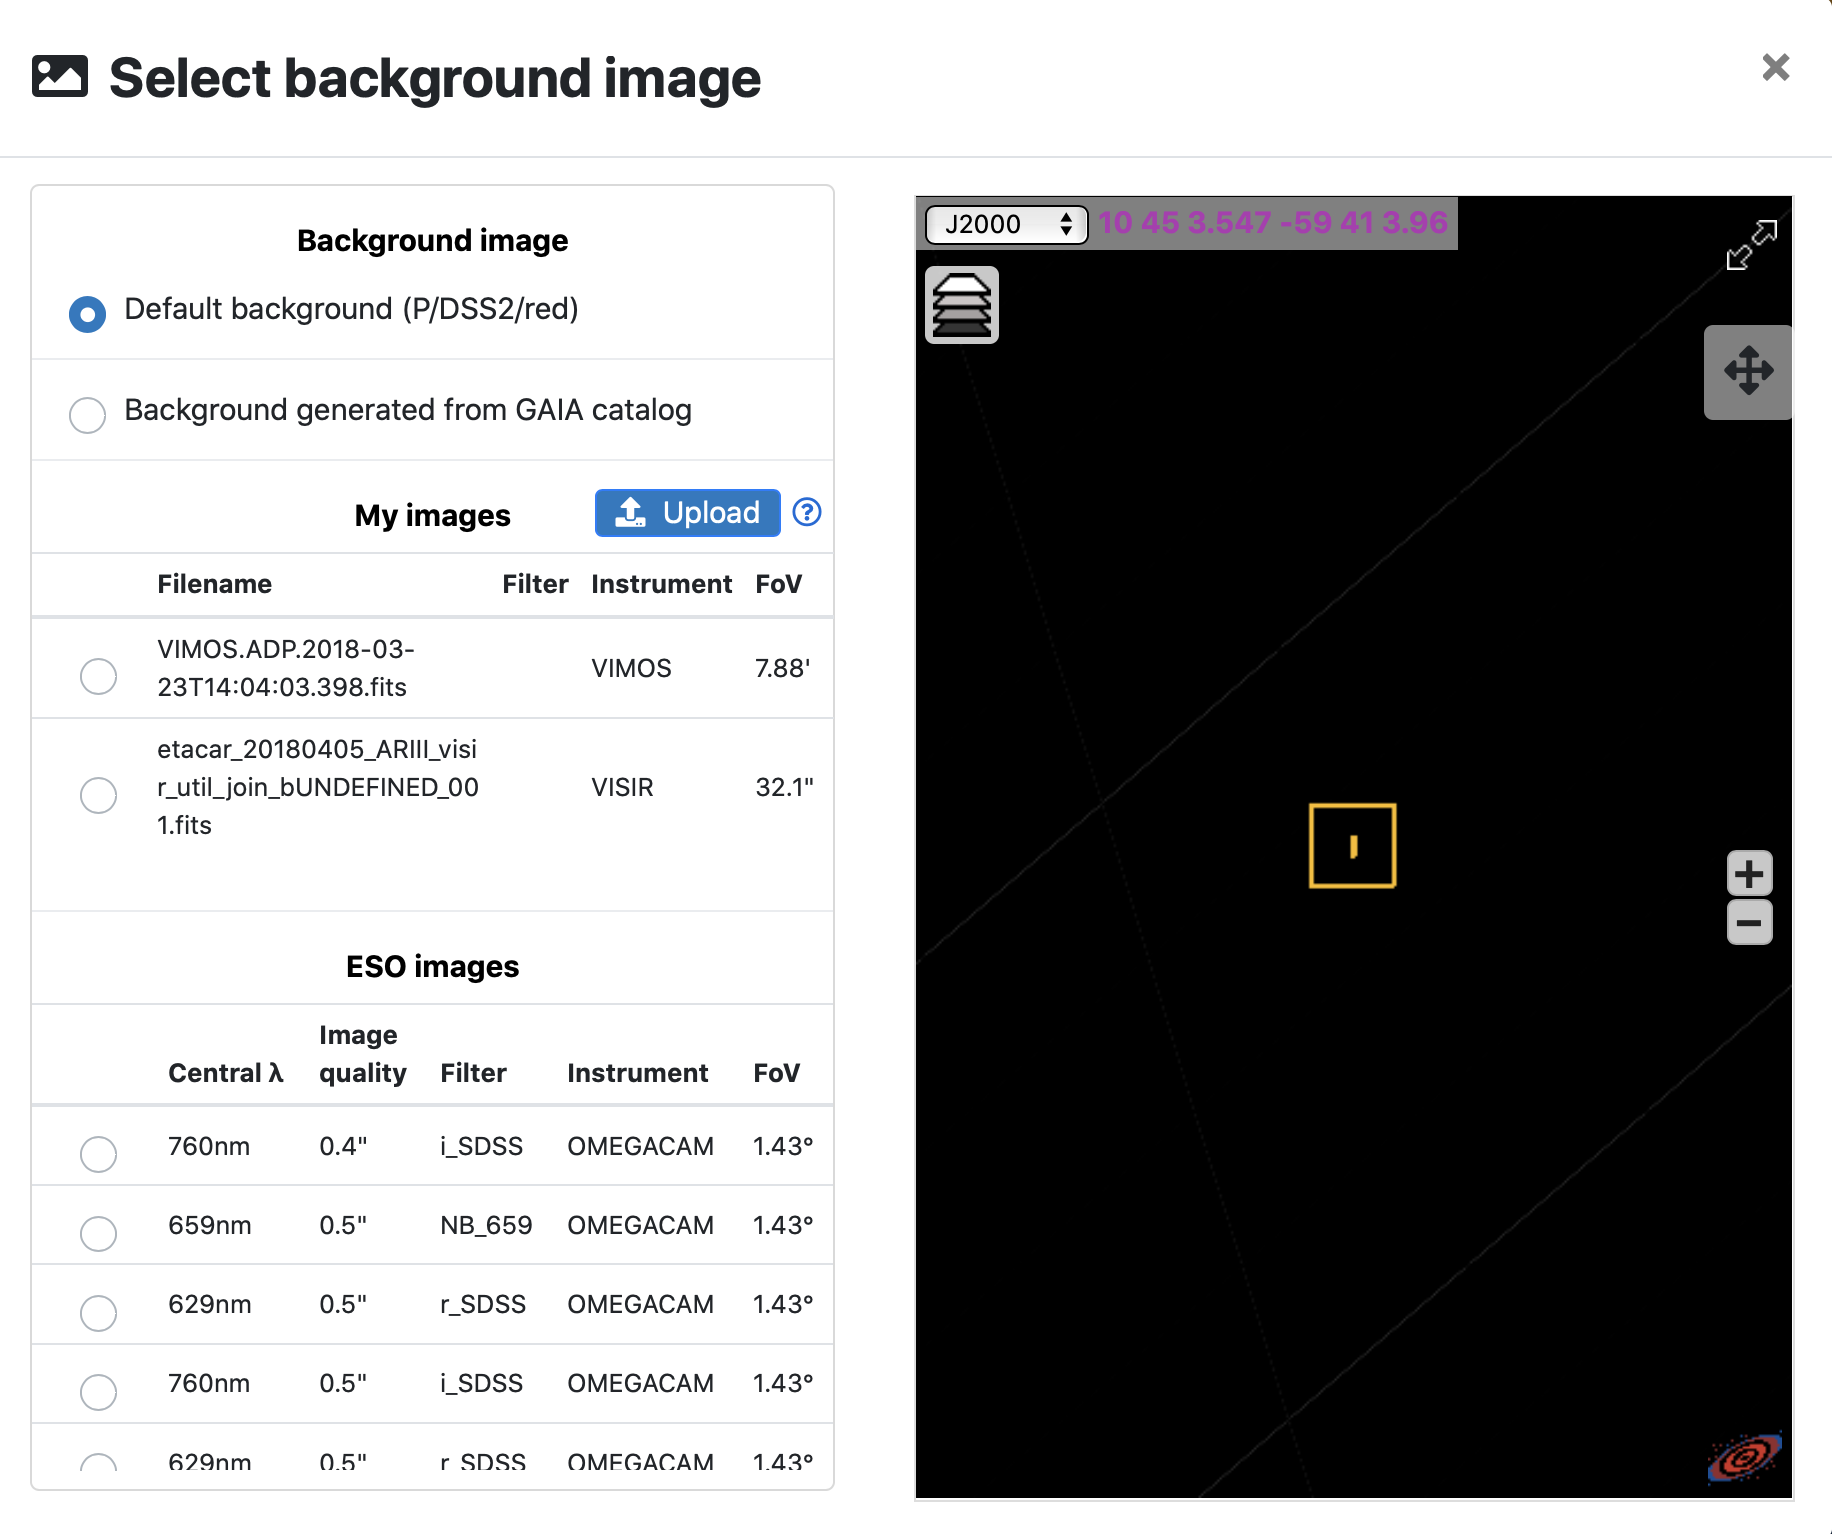
A blue "Upload" button is also presented. Click on this to open a file selector dialog window from which you can select the FITS image you wish to upload and use for Finding Charts and/or ObsPrep.
Once you choose the file and then click the "Choose for upload" button, the upload will begin, as indicated by the "work-in-progress" spinner now displayed in the "Upload" button.

Once successfully uploaded, the new image will be selected automatically and displayed in the right hand panel.
You can change the selected background by simply clicking on the corresponding radio button to the left of the image name in the left hand side of the window.
To create the custom Finding Chart based on this image (as well as the other two default FCs) close the "Select background image" by clicking on the "x" in the top right corner of the pop-up window and then click the "Generate Finding Chart" button.
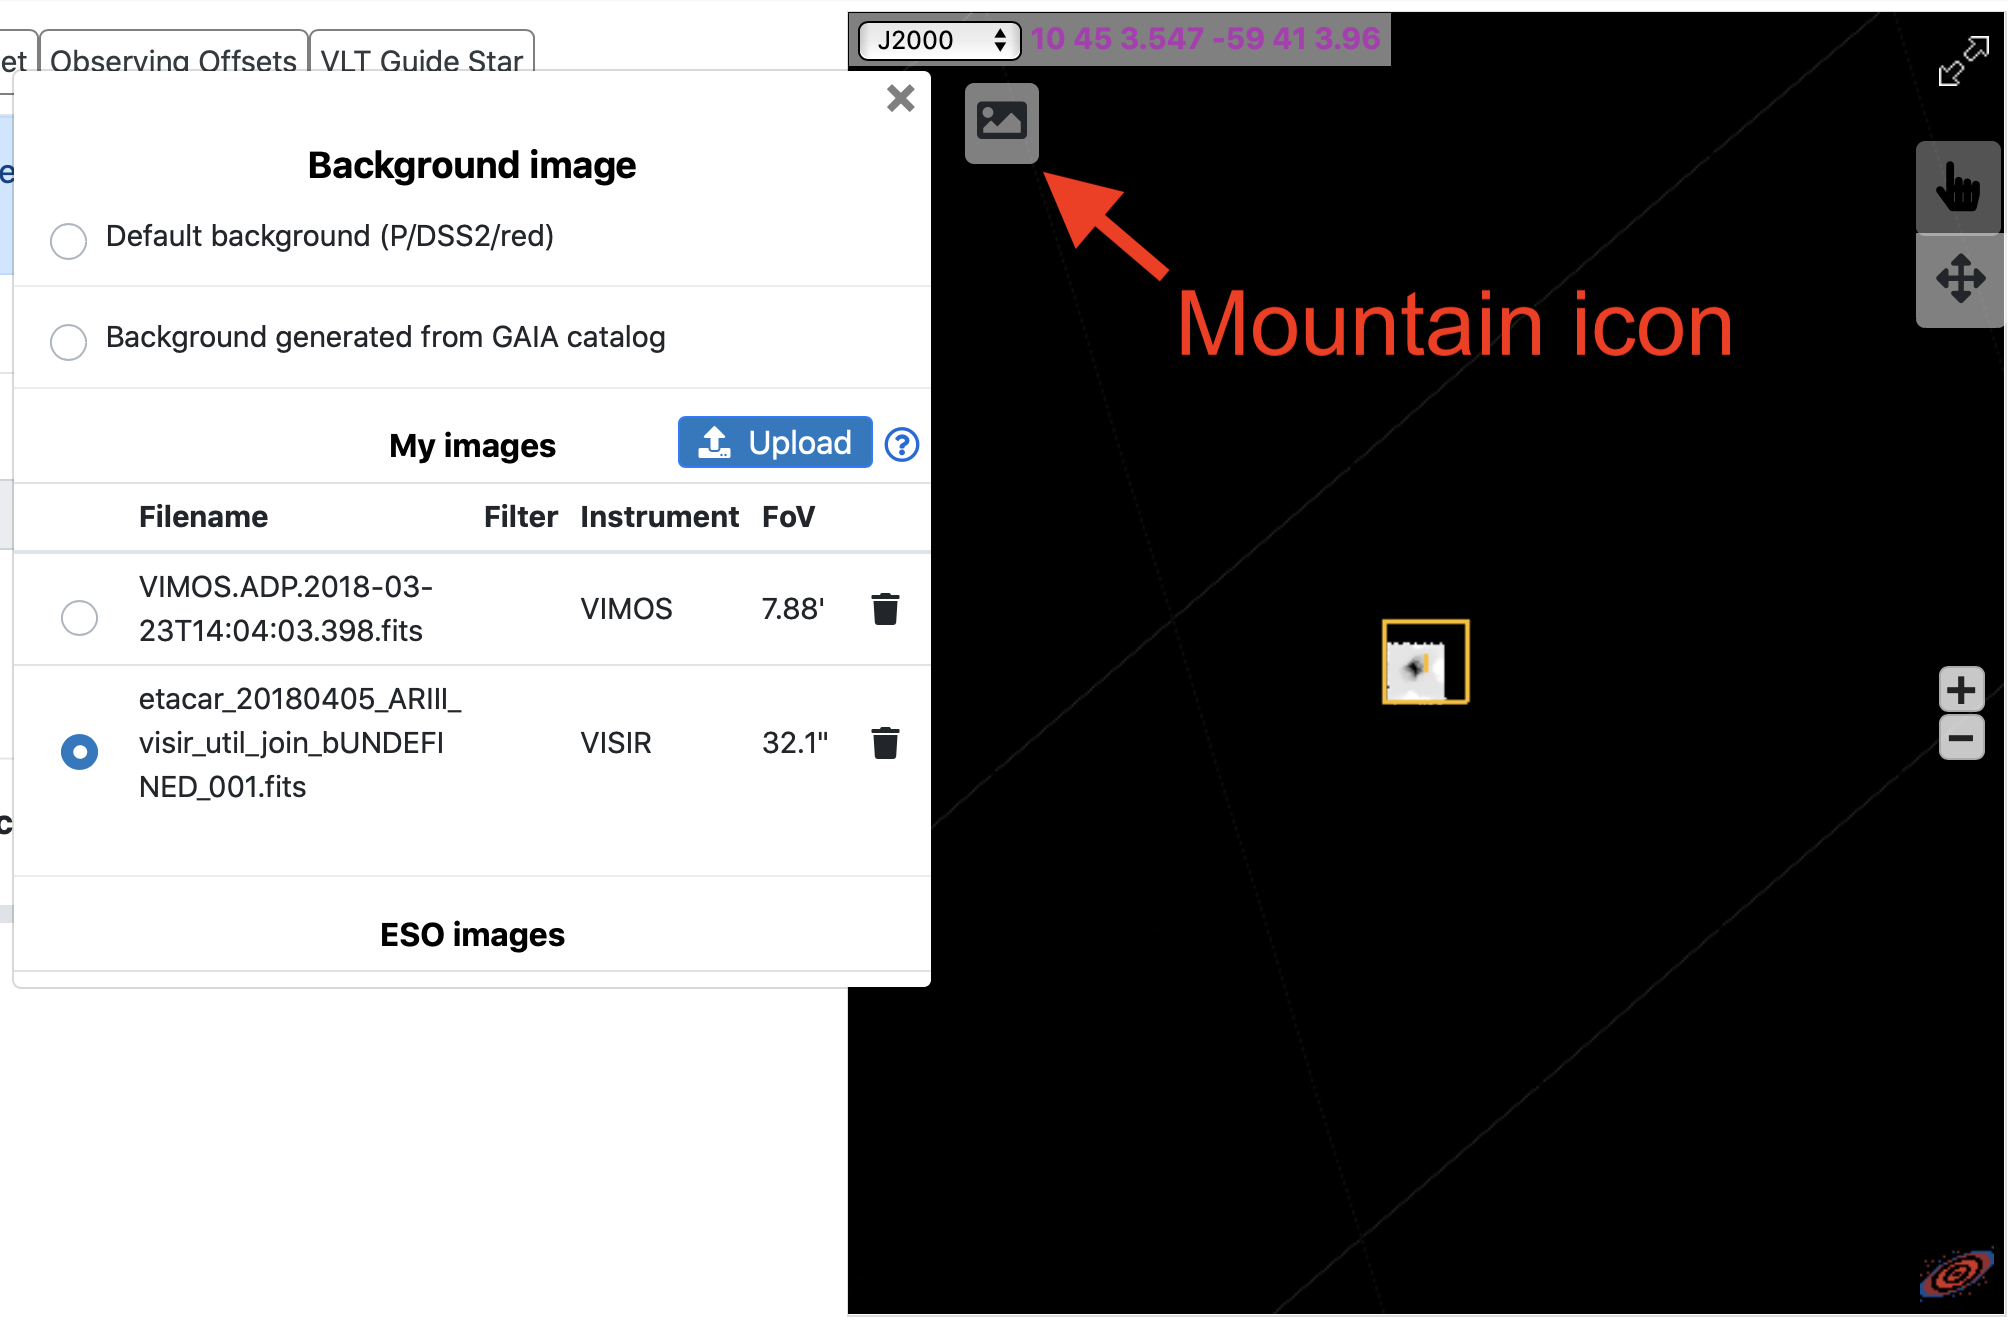
From the ObsPrep tab
Click on the Mountain icon in the upper right corner of the Aladdin image display. A "Background image" pop-up window, similar to the one from the Finding Charts tab will appear, see above for details of using it.
How does it work?
The basic steps of the User Background Image upload process is as follows:
- The FITS file is uploaded to the p2fc server via HTTPS, this can take anywhere from seconds to minutes, depending on the size of the image and the user's upload bandwidth to ESO HQ in Garching, DE.
- Once the image has arrived it is checked for:
- at least one HDU containing an image or images (note all image type HDUs are assumed to be "displayable", i.e. things will probably go horribly wrong if the file contains an image HDU and a bad-pixel map HDU (as an image) for example)
- compatibility with the OB (coordinates of target and BOA reference star are within the field of view)
- either the BANDPASS or FILTER keyword in the header (or in the case of many ESO and GEMINI images "appropriate" header keywords from which the filter can be derived in general ESO RAW, pipeline product and SAF-ADP images should work 'out-of the box', as should GEMINI archive images).
- If the uploaded file is a MEF, a 'tiled' version is generated using SWarp.
- A HiPS represetation is generated for use by ObsPrep.
- The FITS and HiPS representations are written to disk for future use. A successfully uploaded image is then available for use in any run and any compatible OB of the user who uploaded the image.
- If the image was uploaded via ObsPrep it is displayed in the Aladin Lite window.
Delegation
The owner of an image is the user who uploaded the image. When the image is first uploaded it is associated only with the run of the OB that the image was uploaded for. But the image is available for use in any run owned by the owner, or delegated to the owner.
If an already-uploaded image is subsequetly "used" by an OB in another run owned by the image owner, or delegated to the image owner, then that image becomes associated to that secondary run. In this context "using" an image means simply once selecting it from the list of "My images" in the ObsPrep Background Image selector window.
Once an image has been associated to a run by the image owner, (either via direct upload to an OB in that run, or by subsequent use of an already uploaded image in an OB of that run) it is then accessible to all users who have access to that run, either by owning the run or by being a Phase 2 delegate for that run.
A Phase 2 delegate then has access to all of their own images plus any and all images associated with any and all runs owned by or delegated to them. However when a delegate uses an image in a run that the image owner has not used it in, the image does NOT become associated to that run -- only the image owner can associate an image with an additional run. This means that a delegate of the delegate (who is not also delegated one or more runs of that the image owner used the image in) can not use the image, even though they can see it in the ObsPrep Aladin Lite window.
Deleting uploaded images
The image owner can delete an uploaded image by clicking on the trash can icon in the "My Images" section of the ObsPrep "Background image" manager popup window. This will unasscociate the image with all runs it is currently associated with. Subsequently re-uploading the image will then associate it with only the run of the OB it is uploaded for. It will have to be used in the OBs of other runs to (re-)associate it with those runs.
Disk space and culling
The p2fc server has limited storage for uploaded user background images. Disk space is managed automatically and as the disk usage nears maximum capacity images will be automatically "culled" (i.e. removed from the disk). Images used longest ago are culled first.
We hope that the available disk space will be sufficient to retain the user background images of a given period for the duration of that period.